4. Workspaces
Workspaces — Organizing Your Life & Work
A Workspace is the highest level of organization in NoteDex. Think of it as a dedicated space for a different part of your life or work — each with its own set of stacks and cards, completely separate from the others.
What Workspaces Are For
Use workspaces to keep completely different areas of your life separate. Examples:
| Workspace | What goes inside |
|---|---|
| Home | General notes, mixed stacks |
| App Development | Project cards, specs, task boards |
| Personal / Life | Goals, travel plans, life admin |
| Study & Learning | Flashcard stacks, course notes |
| Health & Wellness | Habits, logs, reference cards |
| Student | Subjects, assignments, revision stacks |
Everything you see on the Home page — your stacks and cards — belongs to the currently selected workspace. Switching workspace shows an entirely different set of stacks.
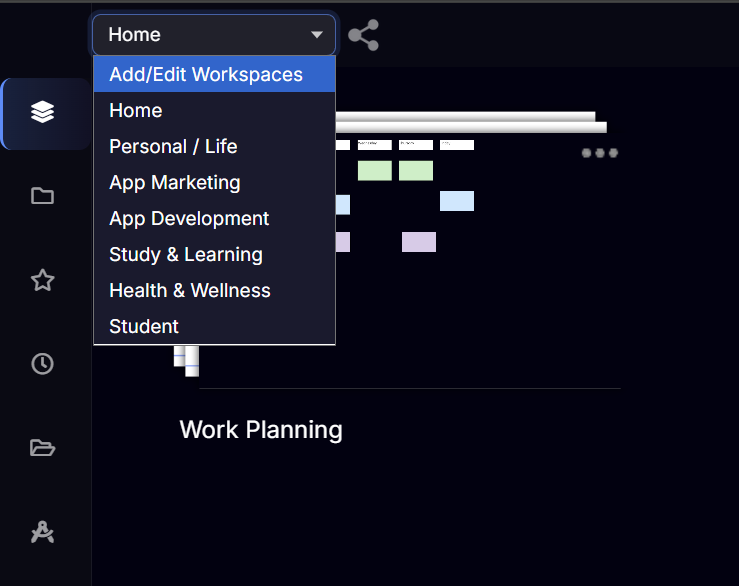
Switching Between Workspaces
The workspace selector dropdown sits at the top-left of the screen, showing the name of the current workspace.
- Click the dropdown to open it.
- All your workspaces are listed.
- Click any workspace name to switch to it instantly.
> Your stacks, cards, and canvases remain exactly as you left them when you switch back.
Creating a New Workspace
- Click the workspace selector dropdown.
- Select Add/Edit Workspaces at the top of the list.
- On the Workspaces management page, add a new workspace and give it a name.
- Choose a background image for the workspace — select from the built-in image library, or use a plain color.
- Save the new workspace.
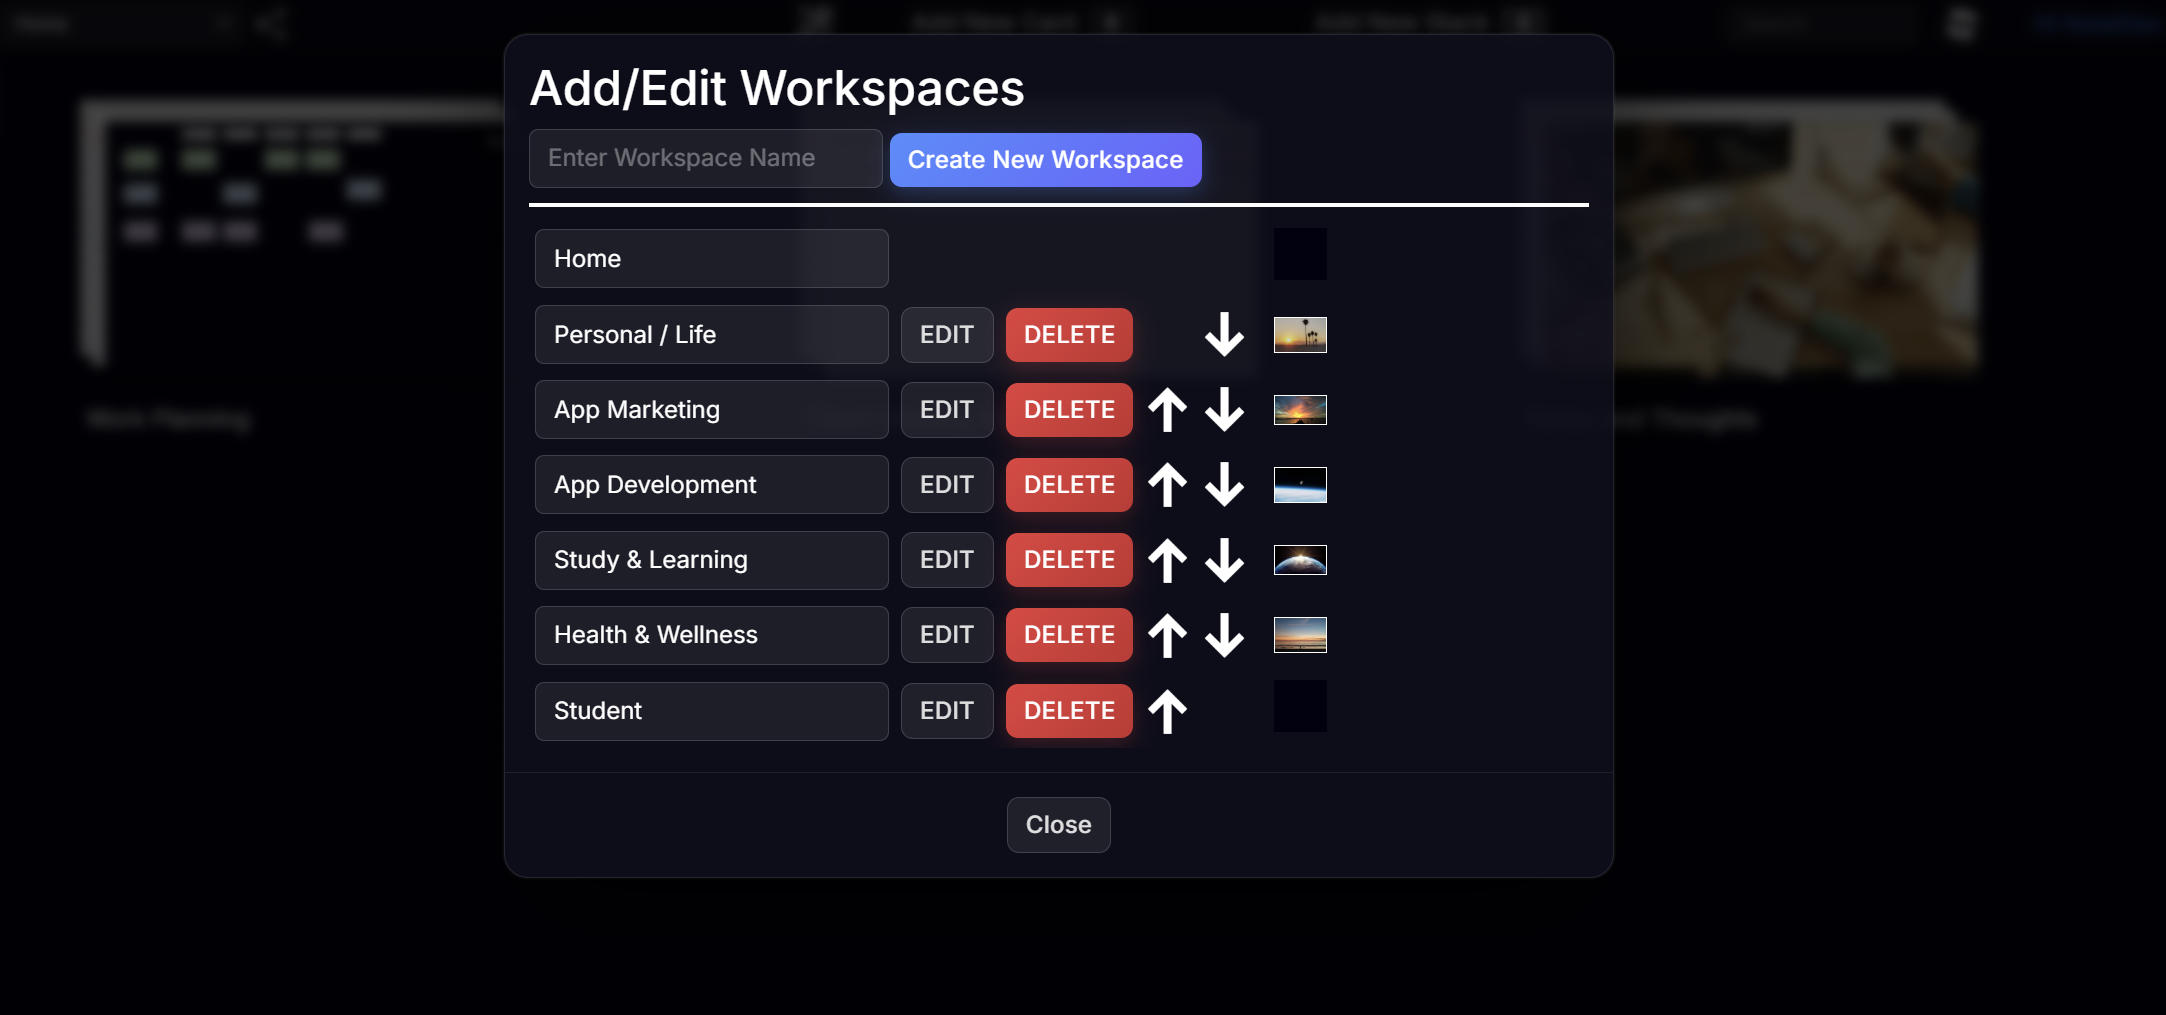
> Note: The Home workspace is the default workspace and cannot be deleted. You can rename and customize it, but it always exists as your main workspace.
Sharing a Workspace
You can share your entire workspace — making all its stacks visible to others via a web link.
- On the Home page, click the share icon (next to the workspace dropdown in the top bar).
- A sharing dialog appears. Toggle sharing on and copy the link.
- Optional: set a password and/or an expiration date for the link.
- Anyone with the link (and password if set) can view the workspace and all its stacks in read-only mode.

Moving Stacks Between Workspaces
You can move or copy individual stacks from one workspace to another without losing any content.
- On the Home page, hover over the stack you want to move.
- Click ... on the stack thumbnail.
- Choose Move to Workspace or Copy to Workspace.
- Select the destination workspace.
Tips
- Keep workspaces broad — use stacks to break things down further within a workspace.
- Data syncs per account — all workspaces sync across your devices automatically. Make sure you sign in with the same provider (Microsoft, Google, or Apple) on each device.
- You can add a card to any workspace's stack — when using "Add New Card" from the Home page, the stack selector shows stacks from all workspaces, so you're never locked in.