12. Printing and Exporting
Printing — Export Stack as PDF
Printing in NoteDex works by exporting your stack as a PDF, which you then print from your PDF viewer.
> This is a popular feature. Every card in your stack will be laid out clearly in a PDF file for printing or sharing— great for study sheets, meeting handouts, and reference documents.
How to Print a Stack
- Open the Stack which has the Cards you want to print.
- Click on the top-right menu '...'
- Click the Save icon
- Select Save as PDF
- The PDF Export options window appears. Select the format you want then click 'Export'
- A PDF file is generated containing all cards in the stack and a window will open.
- Save the PDF and print as normal.


The PDF viewer window opens when the PDF is generated. There is a print icon on that toolbar. Alternatively you can click the blue PDF link generated at the top and you can download the file, and subsequently open/share/print the PDF.
Exporting a Single Card as an Image
To export just one card:
- In the Cards grid view, click ... on any card thumbnail.
- Select Export Card as Image — saves the card as an image file.
- Or select Copy Card as Image to copy it to your clipboard for pasting elsewhere.
Export to Text or Images
You can also use a similar process to export cards as text and/or a whole stack as text or images with the various options available in the menu options. This is helpful if you want to export the text of a whole stack or just a card to another program like Word or Docs or want to use the index cards as images for a PowerPoint or Sheets.
You can also get to this same print dialog when in the Cards view:
- Go to the Home page and hover over the stack you want to print.
- Click ... on the stack thumbnail.
- Select Export Stack as PDF.

The print menu dropdown has many options including but not limited to:
- Printing one card at a time either in Portrait or Landscape
- Printing formatted for Avery 5388 (no border) - ideal if you are using that card stock
- Printing formatted for Avery 5388 (with border) - ideal if you are just printing on blank paper but want to print 3 cards on a page that you can cut out (and save money!)
- Storyboard 2x2, 3x3, 3x6
- 4 cards on a page with front and back
We also provide the option if you are trying to do double sided printing on a printer that supports it — use the option that says 'Both Sides' or 'Both Sides Reverse Sequence' - it will format the printed output properly depending if you just want to view the cards on both sides of the paper in logical order or have them really print out with the back of the first card matched to the front of the first card (in which case it will appear in reverse sequence on that row).

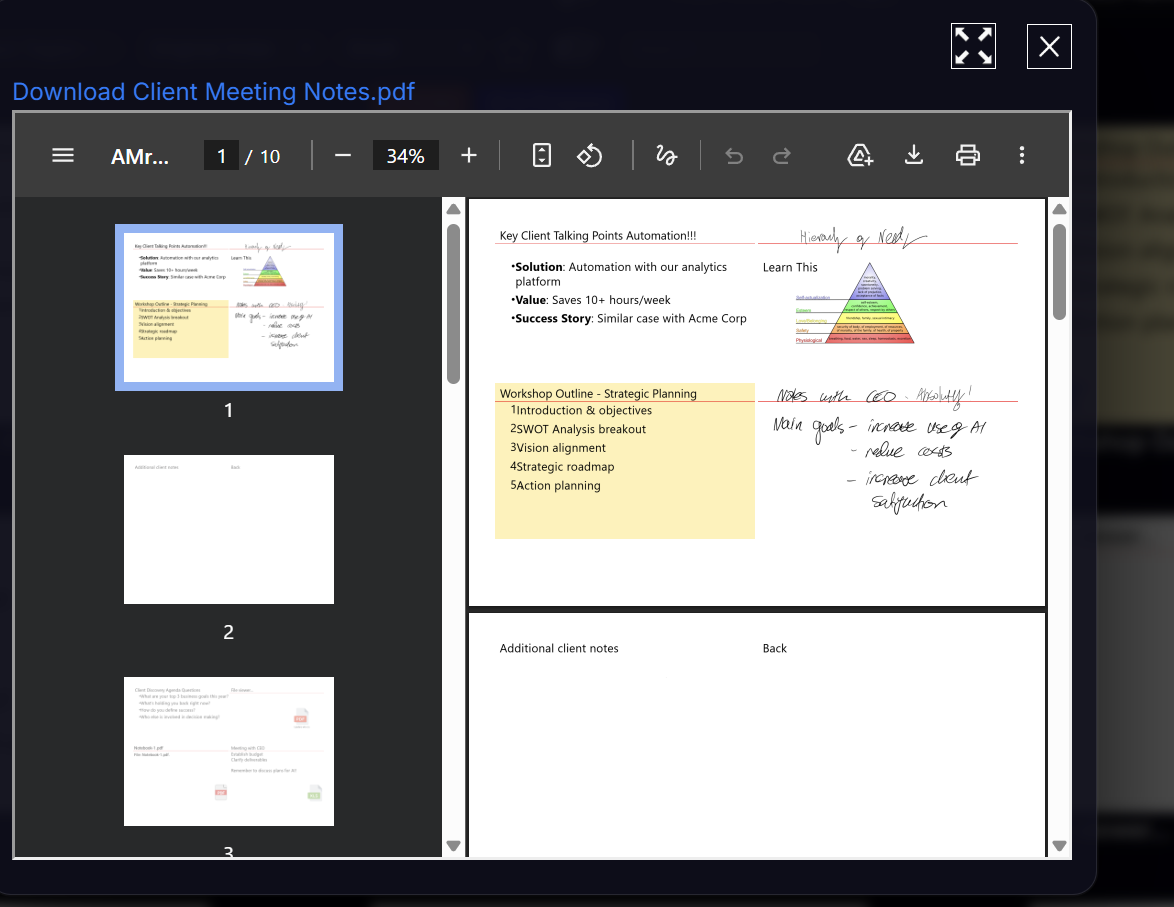
Example of Meeting notes, both sides printed, note the 2nd page has the 'back of cards' information and the 'Additional Client Notes' on the back of that card show in the top-left of the 2nd page.
This is logically expected if you are just wanting to view this PDF and would expect to see the back of the 1st card as the 1st card on the 2nd page.
Alternatively if we chose Both Sides - Reverse Sequence the output looks like this:
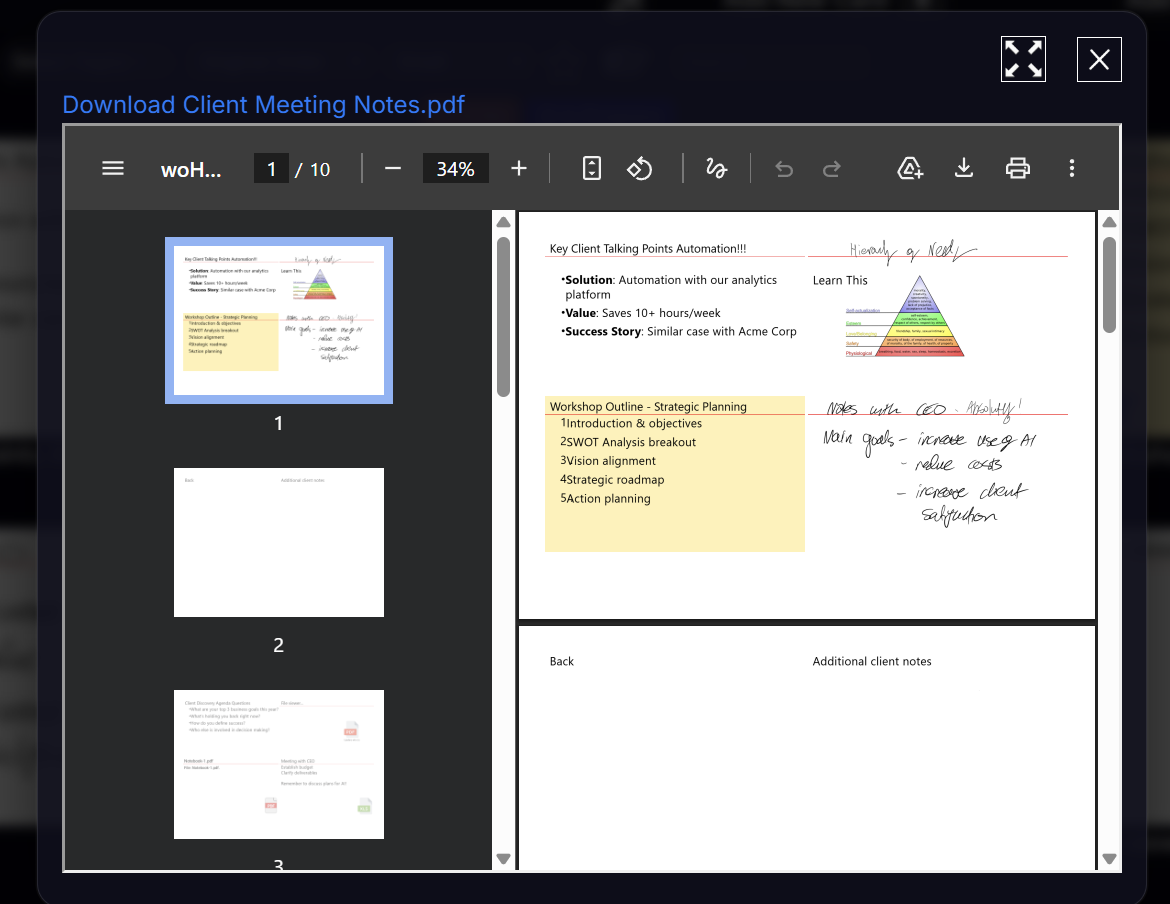
This time 'Additional client notes' is in the 2nd position. This so that when the printer flips the page to print on the back of the paper, the back text will align with front text of the cards.
As you can see printing can get quite complicated. We have some videos. Please check them out or reach out to us if you get stuck!